


Yoodley is reader-supported. When you buy through links on our site, we may earn an affiliate commission.
Have you ever encountered the frustrating scenario where you connect your NTFS external hard drive to your Mac, all set to transfer some files, only to be thwarted by the read-only nature of the drive on your Mac? You’re not alone. This common issue can leave users scratching their heads about how to effectively copy files from Mac to NTFS hard drive. Fear not! This comprehensive guide is here to your rescue, offering step-by-step solutions to this dilemma.
Part 1. The reasons why you cannot copy files from your Mac to an NTFS external hard drive
Before delving into solutions, it’s crucial to understand the reason behind this issue. NTFS (New Technology File System) is the primary file system used by Windows operating systems due to its robustness and advanced features. However, Mac OS cannot grant the NTFS file system writing permissions, rendering them read-only when connected to a Mac. This difference in how the file systems work makes it difficult to transfer files from a Mac to an external hard drive using NTFS.
Part 2. How to copy files to NTFS hard drives on Mac – [Solved]
Thankfully, this problem has several workarounds, allowing you to seamlessly transfer files from your Mac to an NTFS external hard drive.
Method 1: Format the NTFS drive to FAT32 or exFAT | Windows & Mac
One straightforward approach is to format the NTFS drive to a file system that both Windows and macOS can read and write to. Two popular options are FAT32 and exFAT.
Before formatting, ensure you’ve backed up all data from the NTFS drive, as formatting will erase its contents. Then you could begin to format the external hard drive on Mac or Windows PC.
How to change the format of your NTFS drive to FAT32 or exFAT on your Mac?

- Plug in your NTFS drive to your Mac computer, and then open Disk Utility by going to Finder > Applications > Utilities.
- Choose the NTFS drive from the list on the left, then click the “Erase” button at the top (check out the image above).
- Give the drive a name, pick either MS-DOS (FAT) or exFAT as the format, and select GUID Partition Map as the scheme.
- Click the “Erase” button.
Wait until the process of erasing is finished. While this is happening, avoid doing any actions on your Mac.
How can the external hard drives be formatted to another file system on Windows PC?
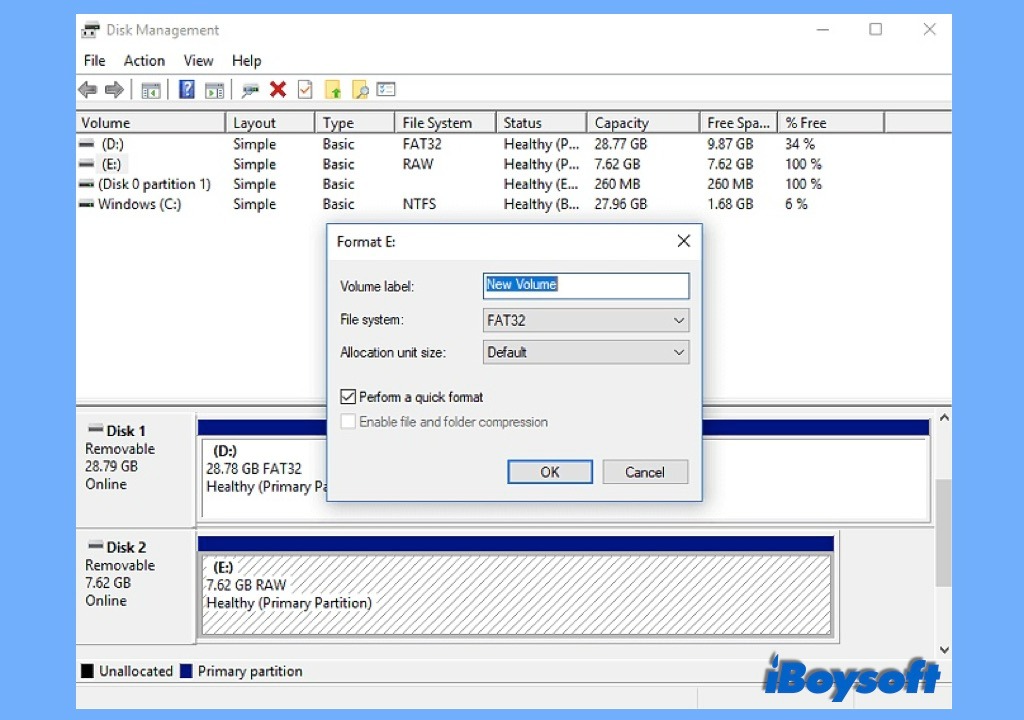
- Locate your external hard drive in Disk Management. If it’s not initialized, right-click on it to choose a style (MBR or GPT). Then, right-click again, and select Format.
- In the Format Partition window, set disk details like allocation unit size, volume label, and format. For cross-platform use between macOS and Windows, pick FAT or exFAT, formats that work on both systems.
- Click OK to complete the formatting.
Once formatted, connect the drive to your Mac. You should now be able to copy files from your Mac to the external drive without any hindrance. While this method works, it might not be suitable for everyone due to the limitations of FAT32 and exFAT. For example, a file’s largest size on a FAT32 volume is 4 GB. You might want to explore the next method if you’re dealing with large files or require NTFS-specific features.
Method 2: Use NTFS for Mac (No need to format your NTFS drive)
An even more refined approach is to utilize third-party software that seamlessly integrates NTFS support on your Mac. This solution is particularly valuable if you wish to avoid reformatting your NTFS drive, especially when it holds many crucial files.
While various NTFS for Mac applications are available, not all live up to their claims; among them, iBoysoft NTFS stands out as one of the most dependable, well-crafted, and user-friendly options. This eliminates the read-only restriction and allows for swift and easy file copying between your Mac and the NTFS drive, resembling the experience on a Windows computer. Furthermore, you can edit, delete, and rename files stored within the NTFS drive directly from your Mac. Follow these steps to utilize iBoysoft NTFS for Mac and enable file copying from your Mac to the NTFS drive:
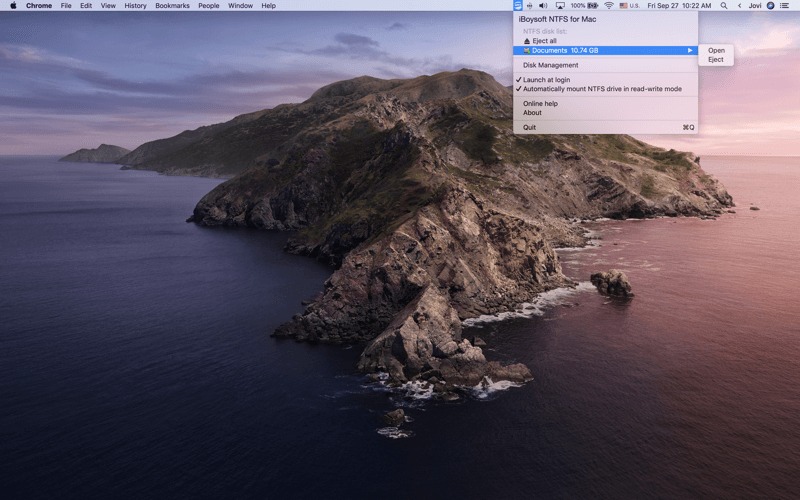
- Begin by downloading and installing iBoysoft NTFS for Mac onto your Mac system.
- Connect your NTFS external hard drive to your Mac, and then launch the iBoysoft NTFS for Mac application. This action automatically mounts the NTFS drive in read-write mode on your Mac.
- Open your NTFS drive, and you can immediately copy any files from your Mac computer to the NTFS drive.
Method 3. Use Terminal App
Utilizing the Terminal to enable bi-directional NTFS drive access (read and write) on a Mac is considered a non-secure approach. It’s an exploratory method, and Apple advises against its use due to the potential risks. This approach could introduce issues within the NTFS drive’s functionality and potentially compromise the integrity of the host Mac’s hard drive, with attendant data loss being a possible consequence.
For a more reliable and secure solution, leveraging specialized software such as iBoysoft NTFS for Mac is recommended. Tailored to harmonize seamlessly with distinct Mac models, this software streamlines the process of transferring files from a Mac to an NTFS drive, offering a more dependable avenue for data management.
However, the subsequent steps are provided should you remain resolute in your desire to proceed via Terminal to activate read-write permissions for NTFS drives on your Mac. However, It is crucial to underscore the necessity of performing comprehensive backups of the NTFS drive and the Mac system before commencing any such procedure.
- Connect your NTFS hard drive/external device to your Mac, then go to the Launchpad on the Dock > Other > Terminal.
- Copy and paste the following command below onto the Terminal window.
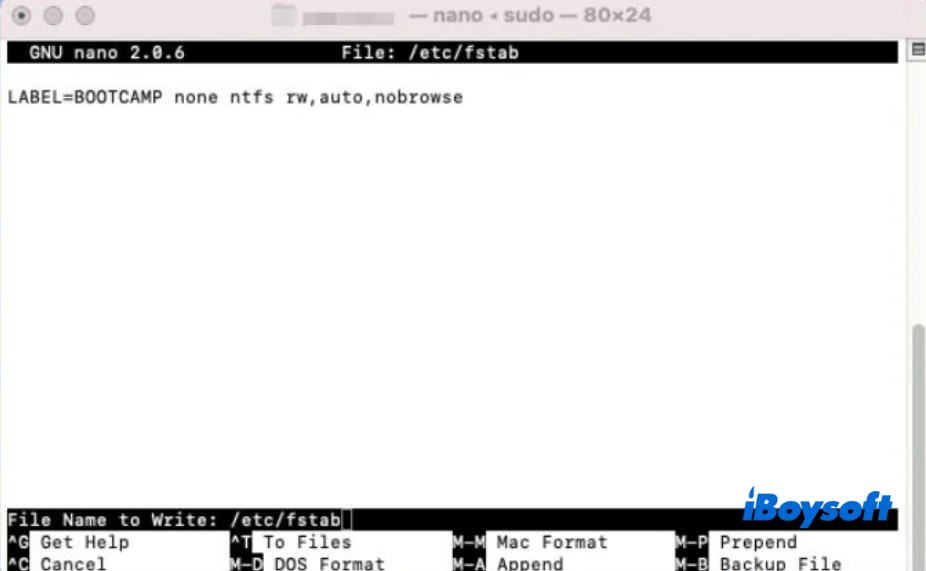
Sudo nano /etc/fstab
- Press the arrow keys to scroll to the end of the list and then type the following command (Please note: In this step, you need to replace NAME with the actual name of your NTFS drive.)
LABEL=NAME none ntfs rw, auto, nobrowse
- Press the “Control + O” and then the “Control + X” keys.
- Open Finder, then choose Go > Go to Folder in the menu bar.
- Enter /Volumes/NAME into the Go to Folder box. (Important: you should replace NAME with the correct name of your NTFS drives in this step.)
- Finally, select Go to open your NTFS drive.
You can now access and copy files to the NTFS drive through the Finder.
Final Words
Working with NTFS drives on Macs in read-only mode can be frustrating. Fortunately, solutions are available. You can reformat the drive for better compatibility, try software like iBoysoft NTFS for Mac, or tweak settings using Terminal. These approaches ensure smoother file transfers between Mac and NTFS drives, enhancing cross-platform sharing.


